Monday, August 17, 2015

Laced Running Stitch

To create this stitch, select one-three different colored flosses (I used yellow, creamish white, and baby blue). To begin, sew a running stitch with your first floss.


To complete a running stitch, enter the fabric as shown above, and exit about a quarter inch away.


This is how the end result should look like:


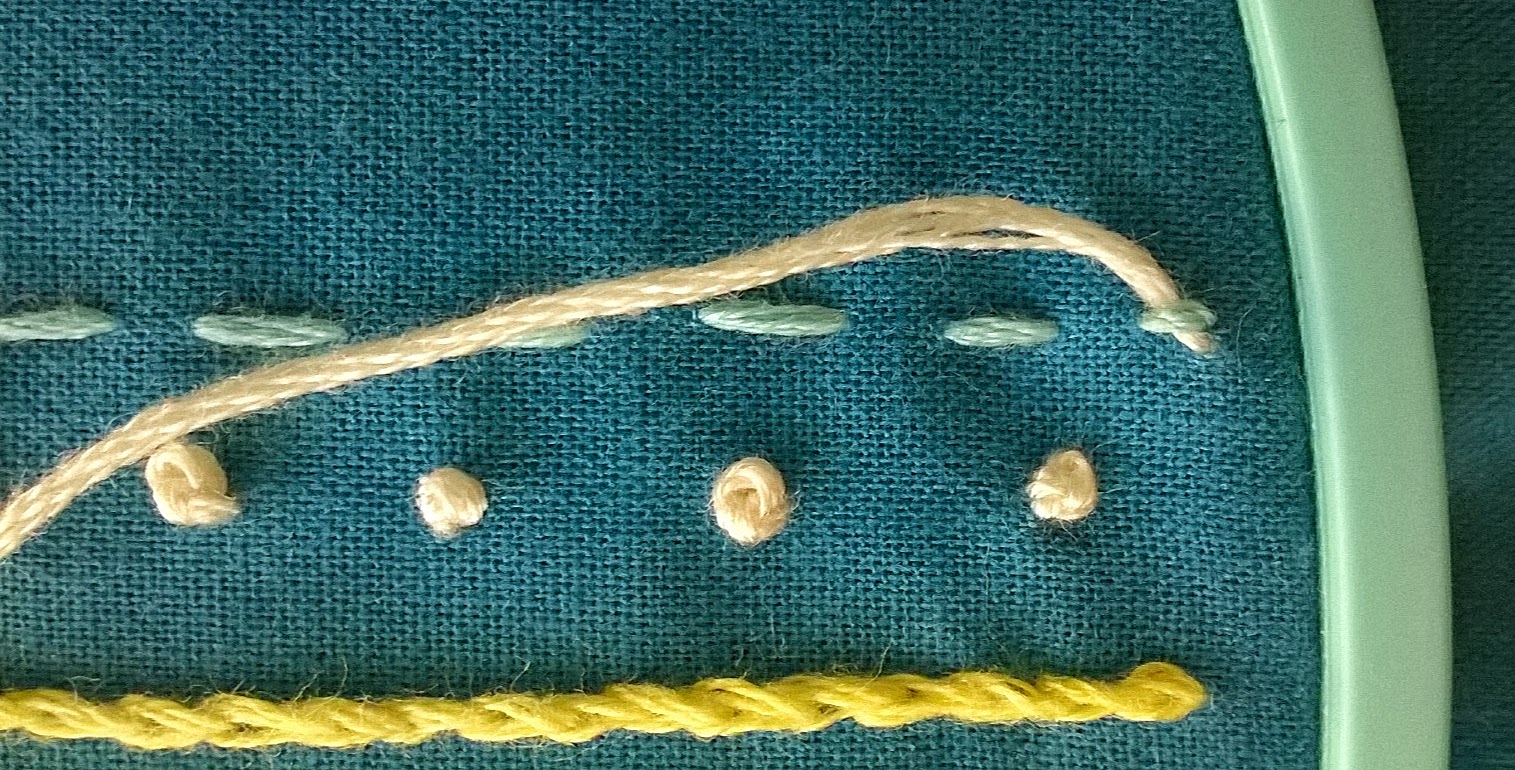
Now, we will begin to lace it. Choose the second floss, thread and knot it, and enter right next to the first running stitch, like so:


(I started on the wrong side since I accidentally flipped it over, but it is normally easier to start on from the left to the right.) Anyway, go through the first stitch, but do not reenter the fabric.


Enter the second stitch on the opposite side.


Continue until you reach the end. Reenter the fabric and knot it like this:


Thread and knot your next floss. Begin on the opposite side of the running stitch this time:


Enter the first stitch.


When you have reached the opposite end, exit right next to the corresponding stitch:


Your finished laced running stitch should look like this:


-Avamae

Saturday, August 15, 2015

French Knots

This knot, in my opinion, is the easiest and most commonly used embroidery knot. It is very easy and extremely useful!

First, enter the fabric on your drawn dot.


Twist the thread 1-4 times around your needle. Traditionally it was only twisted around once, but I prefer doing it twice. Four times, or at least, for most fabrics, is excessive, because it is difficult to pull through.


Then, exit right next to - but not on top of - where you just entered, keeping the working thread taut. It should form a neat knot!


Finished product:


-Avamae

Blanket Stitch

The blanket stitch is a very simple, useful stitch. It can be used for sewing the edges of fabrics together, or as a regular embroidery stitch

First, enter your fabric on your drawn line:


Then, exit slightly above and the the right of where you just entered, not pulling the floss through fully.


Reenter below the floss, pulling all the way through so that it tightens.


When you have finished, make another tiny stitch:


This is how it looks completed:


-Avamae


Friday, August 14, 2015

Split Stitch

When I first began to blog (which was not, in fact, very long ago) I thought that it would be fun to teach basic embroidery stitches. The first stitch I ever learned is the split stitch, so I decided that it would be fitting to teach that one first.

First, enter your fabric and make a small straight stitch. Then enter through the middle of that stitch as shown:


Exit by making another stitch next to the first.


Reenter the previous stitch in the middle.


Continue until you have entered your last stitch:


Make a small final stitch at the end.


The finished product should look like this:


(Tip; The smaller the stitch, the prettier the result. I embroidered very small stitches in this example, but often they are bigger and sloppier.)

-Avamae


Thursday, August 6, 2015

The Friendly Little Bee-Eater


This is the very first animal I have ever embroidered, and probably the hardest project I have ever completed. I used the split stitch for the branch, and the long and short stitch for the bird.

(Fun Fact: I painted the fabric blue because I do not like the shade of light blue fabric that I have. Painted fabric is difficult to work with because of the stiffness, so I painted it after I embroidered the bird. However, I so much water and so little paint, that I do not think it would have mattered.)

(I got the idea from an embroidery called "The Friendly Little Bee-Eater, so that is why this post is titled "The Friendly Little Bee-Eater.)

Here is a close up of the bird:


-Avamae