Sunday, September 27, 2015

Bullion Knot

The bullion knot is the hardest knot I know how to complete. It is absolutely beautiful for flowers (Look at the third pink blossom in http://www.avabethmae.blogspot.com/2015/06/three-large-embroidery-flowers.html) if you like them to pop out more, like French Knots.

First, enter 1/2 inch away from the beginning of the line.


Exit at the beginning of the line, but do not pull through.


Reenter where you began.


Point your needle where you exited in step 2 and twist the floss around it about ten or twelve times. (Sorry the pictures are so blurry!)


Pull your needle through, making sure to run your fingers up and down the working thread to make sure that there are no knots. (TIP: pull out the thread that is not the working thread)(the lazy thread)(quickly. It will make it much easier to pull through.)


Tighten.


Exit right under where your string protrudes.


Tighten.


To save thread, enter instead this time next to the right side of the previous bullion knot, and embroider it the opposite way. Honestly, you could have began at the beginning of the line the first time - it makes no difference.


To continue, go back and complete steps 1-8.


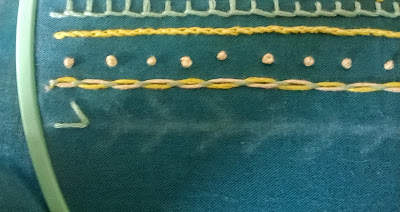
Here is the completed line of bullion knots.


-Avamae

Tuesday, September 15, 2015

Whipped Stem Stitch

The stem stitch is a commonly used stitch, great at creating curves or the stalks of flowers.

First, make a loop by exiting 1/4 inch away from where you entered, but do not pull the loop through.


Reenter through the middle of the loop, making sure that the loop is facing the same way each time.


Pull through.


Exit 1/4 inch away from the last stitch, but do not pull through.


Reenter where the last stitch ended, as shown:


Pull through.


If you are a more experienced embroiderer, try this technique (called the sewing method) to complete the stem stitch faster:


When you are at the end of the hoop, exit and pull through.


Here is the completed stem stitch.


Now, we can begin what I call "surface stitching" - stitching onto the finished stitch, rarely touching the fabric.

Enter on one side of the end of the stem stitch, and slide through the first stitch.


Pull through.


Slide through the second stitch the same way.


Continue looping around the stitches until you've reached the end. Exit next to the last stitch.


-Avamae

Saturday, September 12, 2015

Chain Stitch

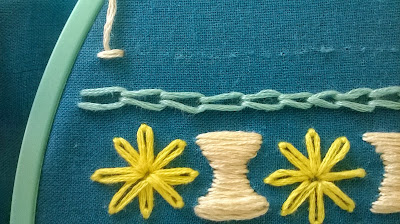
The chain stitch is a variation of the blanket stitch, used as a border or even for filling.

First, make one line across your material with your fabric pencil. If you are a beginner, make two lines really close together.

Enter through the line with your threaded needle and pull through.


Exit right next to where you just entered, but do not pull through.


Reenter 1/2 cm to 1/4 inch away from your starting point, but still do not fully pull through.


OK, this gets kind of confusing, but stay with me! Reenter just like you did on the last loop - right next to where you entered, but do not pull through. Pinch the loop you just made and pull so the previous loop is taut.


Reenter 1/2 cm to 1/4 inch away from the first loop, exit a small space away, and pull the loop to tighten the last one.


Create and tighten these loops until you reach the end. Then, when you enter, do not exit and make another loop.


Make one more stitch on the other side of the loop to lock it in place.


Here is a picture of the finished chain stitch:


-Avamae

Friday, September 11, 2015

Fern Stitch

The Fern Stitch is an easy, attractive stitch, often used for stems or borders.

First, draw a straight line on the material with a fabric pencil. Then, enter at the beginning of the line with your threaded needle.


Next, exit about 1/4 inch away from where you entered.


Reenter about a quarter inch to the left of the middle of the stitch, as shown:


Next, exit at the same place you did on the previous stitch.


Enter on the opposite side.


Then, exit in the place where the other two stitches meet.


Reenter 1/4 inch away from the point where all the stitches meet.


Exit where the stitches all meet. (Note: You are basically repeating the last 6 steps.)


Enter where you entered last.


Can you guess where you're supposed to go from here?


Reenter at the point where the stitches meet.


You should seriously be able to guess where you put this next one.


Go back to step one, and alternate between these steps every three stitches.


-Avamae

:)